Well, I’ve designed the printed circuit board (PCB) for the solar panel tracking system and the prototype hook up on the bench appears to work very well, although I’m waiting for some new gas lift struts to work with the linear actuator to take the load off the motor.
However, here’s a clip showing the bits and bobs that I’ve tinkered together
And here’s another clip of it in action
We’re going over to Spain again this coming weekend to meet the builder and to actually poke some marker sticks into the ground showing where we want to place the workshop/garage, the solar panel bases and the little shed which will house the batteries and inverters, so it’s nice to see some progress.
At the moment, I’ve just screwed the panel and actuator to the floor in my workshop, however I’m intending to bolt the stuff directly down to the concrete bases that will be poured in a few weeks time with a little bit of luck. The first pair of gas lifts struts that I bought from EBAY were dirt cheap, but like anything cheap you get what you pay for! Unfortunately, the struts aren’t adjustable so both struts give a total lift of 120KG so it’s way too much for my panels which weigh in at 20Kg each or a total of 60KG.
Of course, there won’t be a force of 60KG or 600N on the linear actuator which is capable of lifting 150KG, but there will probably be of the order of 50KG load when the panels are lying nearly flat. The gas struts will also help to give the panels some stability in the wind as they’ll be attached to either end, whilst the linear actuator will be placed centrally to the panels, which are about 160cm long. So, I’ve ordered a pair of 20KG (200N) struts from The Strut Depot, which sounds American but really isn’t. These should take the majority of the load off the actutaor whilst leaving enough load for me to detect the current being taken so that I know when the panel has stopped moving. This is essential as the way in which I will set the angle of the panels is by timing the movement of the linear actuator from end to end and then estimating the distance required for each angle during the day..well, that’s the theory! So far, it seems to be holding up…
In the videos you can see some of the circuit boards that will connect to the PIP4048S solar charger/mains inverter together with the 8-way solar panel power monitor. These also connect to the panel tracking units to allow me to monitor them for faults and to pass information such as the date and time across to the trackers – this obviously needed for the trackers to position the panels at the correct angle at the appropriate time of day. I’m not relying on any kind of sensor to locate the sun as that could cause issues when it’s cloudy and I don’t want the panels hunting for the sun unnecessarily.
You can see in the video clip that I’ve decided to lay the panels on their side, effectively in landscale rather than portrait mode as, again, I want them to be less susceptible to wind.
Lastly, the hinges that I’m using are ball bearing hinges intended for very heavy doors. I intend having three hinges per set, one hinge at the outer edges of the panels and one directly in line with the linear actuator in the middle of the central panel of the three.
It’s getting quite exciting here in Northumberland as I’m actually seeing the stuff coming together. Now all I need is another 51 panels and 6 sets of control electronics, 18 linear actuators and 36 gas lift struts and Bob’s your Auntie! (we’re equal opportunities Up North and if Bob wants to be an Auntie instead of an Uncle, that’s his right).
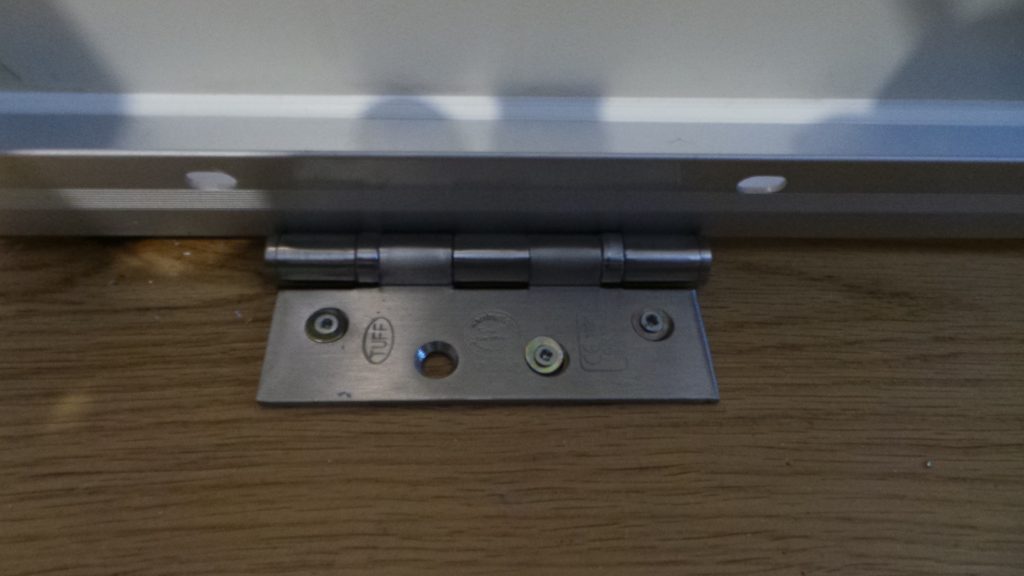
Ball Bearing Hinges
The hinge that I’ve selected is just a 100mm, ball bearing hinge that would be used on a very heavy door and so should be fairly long lived. Oh, and it’s stainless steel. Everything is going to be stainless steel as I don’twant rusting anywhere.
You can also see some of the other circuit boards in the viceo clip including the interface to the PIP4048s solar charger/mains inverter and one of the 8-way solar power monitoring boards.
Onwards and upwards
STOP PRESS – Update!
Here’s a neat little excel spreadsheet that I’ve tinkered together to check the maths for the angle of the solar panels. Just type in the time e.g. 9.25 is 25 past nine, the date and the latitude of your installation and the final box will give the angle of the sun above the horizon. Don’t adjust for summer time as it actually needs solar time.
So, I’m working on the software to go in my solar tracking circuit that will use a light sensor to measure the length of the day and then make an approximation of the date and time and use that to track the sun… Fingers crossed!
Latest Update – 4/9/2017 – GPS Updating
I had a brain wave and realised that if I plugged in a satnav GPS module then I could get the latitude, longitude, time and date. From all that, I could then derive the time zone and thereby calculate the solar panel angles, all without setting up anything manually.
The result? Well, a $3 module plugged in and it works! I’ll update this with some pics when I get a chance. We’ve just had a power cut at home in Northumberland and I’m currently running on my test PIP4048 mains inverter and as the sun has gone down and it’s been raining all day, I don’t have a huge amount of power available.
Recent Comments